If all you want is a single Google Web Font to use on your site you can follow the steps in the KnowledgeBase article at http://www.softpress.com/kb/questions/276/. However, if you want to use variations (i.e., different weights and italic) you need to use a slightly different workflow.
Many Google Web Fonts (in common with other “@font-face” fonts use a range of values to describe their font “weight” - so the Light variation of the font uses a value of 300 and a Bold variation uses 700 (though these do vary).
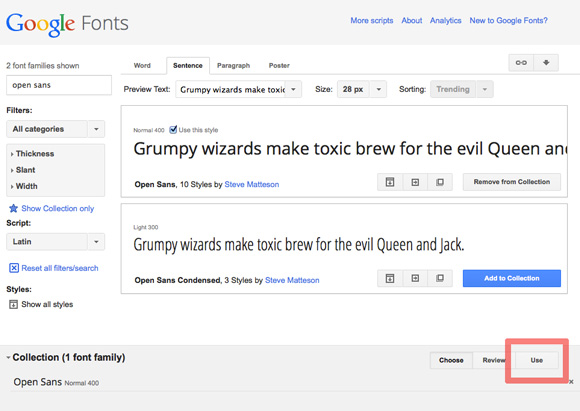
Let’s say we want to use all the variations of the font called Open Sans - so go to the Google Web Font site at https://www.google.com/fonts and search for open sans. In the search results window, click on the large blue Add to Collection button in the panel for that font.

In the Collection panel which now shows below in the browser window, click the Use button.
In the next window, switch on the checkmark for each variation you want to use.
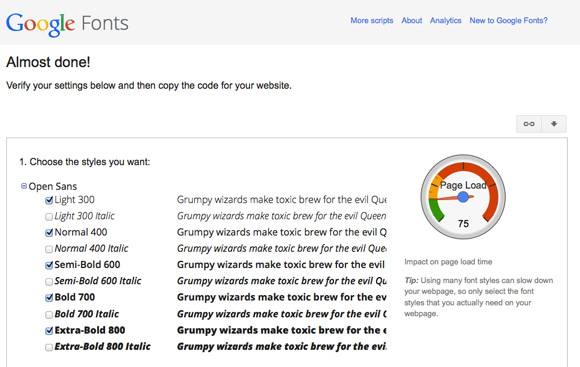
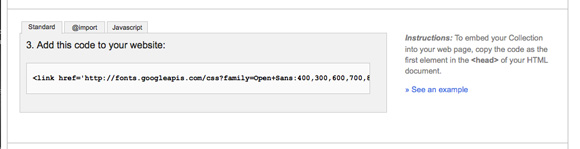
After that, scroll down the page and copy the code displayed inside the panel in the 3. Add this code to your website: section.
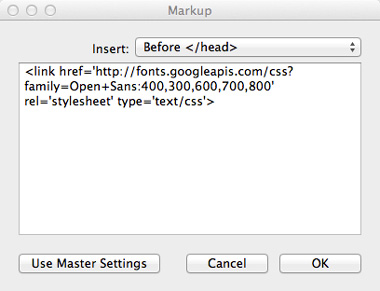
Now start or restart Freeway (this is important to load the font into Freeway), select Page > HTML Markup. Make sure the Insert popup is set to Before </head> and paste the code then click OK. If you do this on your Master page (or pages) this will mean that you can use the Google Web Fonts on all the pages of your site.
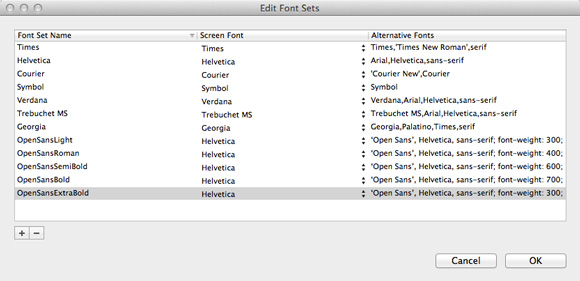
Now go to Edit>Font Sets and click on the “+” button in the bottom left corner. Enter the new font variation in the Font Set Name column (so for the first one here I’ve entered OpenSansLight), click on the font listed in the Screen Font column and choose Helvetica Regular, then in the Alternative Fonts column, enter
‘Open Sans’, Helvetica, sans-serif; font-weight: 300
(make sure you use all the single quotes, commas, semi-colon and colon characters exactly as they are used above, because this needs to be use in the CSS of the file. It is very important to note that the single quote character MUST be a standard HTML upright quote character and not the “curly” (typographer’s) quote that your keyboard usually uses. To prevent any problems we recommend that you scroll down the Google Web Fonts page to section 4 and then copy the characters after “font-family: “ in the panel and then paste that into the Alternative Fonts column before editing it to suit.

Keep creating new font sets for each of the new styles you want to create (using logical names such as 400 for Roman, 600 for Semi-Bold, 700 for Bold and 800 for Extra-Bold in this example) so you have a new font set for each variation you want to use and then click OK to close the dialog.
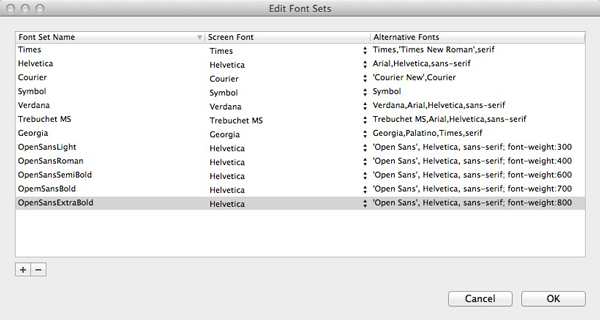
The screenshot below shows what the Edit Font Sets dialog will look like if you don’t install the fonts on your system that you can download from the Google Web Fonts site (in which case you might want to choose Helvetica as that font is very similar to Open Sans). If you do install the fonts, you should click on the font in the Screen Font column and choose that font in the list of installed fonts. Although you will need to restart Freeway after installing the fonts, the benefit of installing the downloaded fonts is that you will see the exact font in Freeway as you build your pages.
If you don’t install the fonts, they will display in the font that’s set in the Screen Font column, and you will only see the true fonts in their correct font weights by previewing or previewing your site in a browser. This is how the sample file you can download from the link at the foot of this article is set up, which means that you won’t need to install those fonts to test the sample file by previewing.
Note also that there are two ways to use the font-weight code. The screenshot shows that you can add a semi-colon and a space after the last Alternative Font and then add the font-weight value for each weight you wish to use.
The other way is to create new custom CSS text styles for each weight. The advantage of this is that it requires a lot less code when the file is published (as it doesn’t need to redefine the fonts for each style), but this does mean that the various weights will all show up as the same screen font in the Freeway interface.
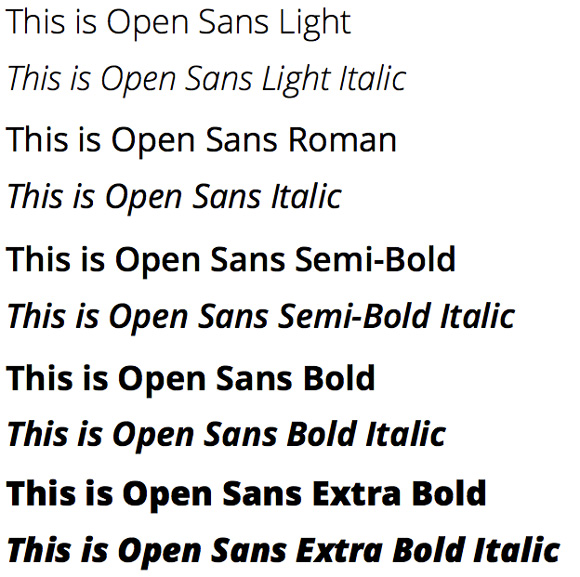
Now draw an HTML item on your page, enter some text inside it, choose a large size so you can see things clearly, and then select the text and choose the Font Set you want to use in the Font popup of the Inspector. If you want to use italic, either by go to Style>Type Style then choose Italic (or choose Em in the Inspector’s Styles tab in Freeway Pro).
Although you will be able to see the difference between roman and italic text, you won’t see any difference between the different font weights on the Freeway page (because they will all display as Helvetica Regular - as that is what is set in the Edit>Font Sets dialog), but when you click Preview or preview in a browser, the fonts will display as they should.
A sample Freeway Express file (which can be opened by Pro users) is available on the link below.
Google Web Fonts Sample File.zip (76.5 KB)