What the Action can do: This Action lets you do the following:
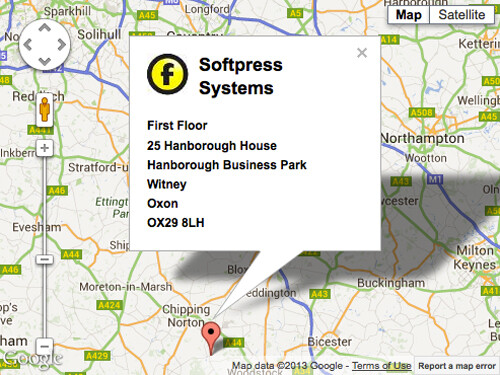
- It lets you set up multiple markers (with graphics and text inside the box panel) to use as map markers on a Google Map Action item.
To use the Action, you must apply it to an HTML item which is a layer. With the layer item selected, go to Item>Actions and choose Google Maps Marker from the list. With the item selected you can see the options in the Actions palette:
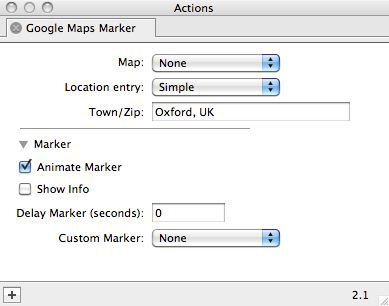
- Map: Choose the Google Map item on your page you would like to use this Map Marker on.
- Location entry: Choose from Simple or Advanced. Simple lets you use a town or Zip/Post Code to use for the Map Marker; Advanced lets you use specific Longitude and Latitude values.
- Animate Marker: This is switched on by default and it gives a short animation when the Map Marker appears (it bounces a couple of times). Switch this off if you do not wish to use the animation.
- Show info: This is switched on by default which means that the information used inside the HTML layer item will be used in a speech panel box with the Map Marker item. If you don't want the box panel to appear (ie, you simply want to use a Map Marker with no further information) switch this option off.
- Delay Marker (seconds): By default this is set to zero - which means that the Map Marker appears immediately. However, you can enter a value for a delay (in seconds) after which time the Map Marker can be made to appear.
- Custom Marker: If you don't like the default Google Map Marker, you can choose a pre-created graphic in this popup to use as the map's Map Marker.