The Random Image Action allows you to place a banner on your page and to have Freeway randomly choose the graphic that is displayed, with an optional hyperlink. If you wish to have, for example, advertising banners on your page (where each banner has a different link), this action will correctly associate the link with the banner. You can test the Action working by clicking the browser's Refresh button to force the display of the next random image.
The Random Sequence Action can also display graphics - but this will be in a random sequence 'slideshow' which changes the image after a predetermined time. You can also have hyperlinks applied, but only by using the images with the Target Show/Hide Layer Action (Pro-only). If you do not want to have hyperlinks applied, it is more simple to use the Target Image Action or the Target Show/Hide Image on a "stack" of target images.
To work with the Random Image Action, the images can be applied to the page by either creating separate graphic items on the page on top of each other in a "stack". Or, you can draw just one graphic item and then apply the Random Image Action to it by selecting the top item in the stack and going to Item>Actions and choos, selecting each image in turn from your hard drive in the Action Palette in the Parameters panel.
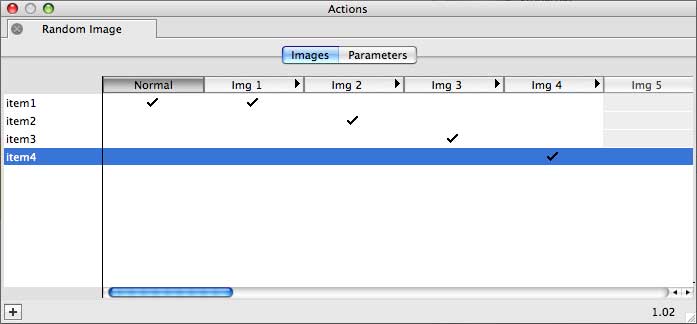
If the images are stacked, then only the top image needs to have the Random Image action attached to this. Place a check in the Img 1 column (see diagram above) against the first random graphic and so on. If you want a specific image to be shown if, for example, Javascript is switched off in the browser, place a check in the normal column too.
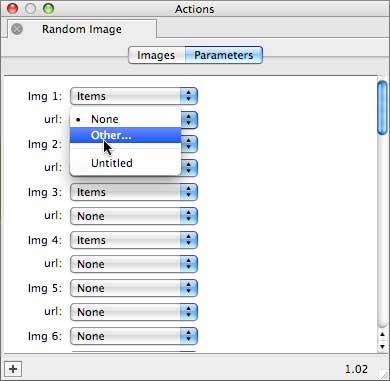
The Parameters panel of the action palette (see diagram above) allows you to select URLs that are associated with that image, this can be a link within your current site or an external hyperlink.
If you have a link applied to the Graphic item, this link will be the default link i.e. the link that is present if you do not have a link specifically associated with one of the graphics.To use the Random Sequence Action, you first need to set up a stack of Target Images on your page. Once you have your stack of images created, you then need to apply either the Target Image Action, the Target Show/Hide Image Action to the top item of the stack.
If you want to use the Target Show/Hide Layer Action (so you can use hyperlinks on each item) you need to make each item in the stack into a Layer by either switching on the Layer option in the Inspector or by drawing the items with the CSS Layout button switched on (don't forget to switch it off afterwards). You can then select each item in turn and apply a hyperlink. The simplest way to do this is to scatter the images around the page (so you can see them all and select them individually) then, once you're finished, you can select them all and go to Item>Align and choose Center for Horizontal and Vertical.
With the stack set up and the Action applied, you then need to apply the Random Sequence Action. As this is a Page Action, go to Page>Page Actions and choose Random Sequence. Switch on the triggers in the Actions palette so you have the same number of triggers for the amount of images in your stack.
Note that the Random Actions will not work with Image Maps.