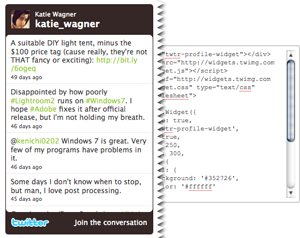
First, you'll need to find the widget and corresponding code that you'd like to use. Most widgets offer their code in a single snippet of code meant to be put in the "body" of your site. Copy all of the code for the widget, making sure not to leave any out. If you see note of the Width and Height of the widget, jot them down.
In Freeway, select Insert > Markup Item. In the dialog box that appears, paste the widget code and click OK. You will see a small square box on your document with an <H> on the upper right hand corner, like this:
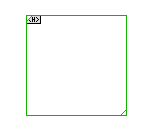
This item can then be positioned on your page like any other Freeway item.
If you jotted down the dimensions of the widget, you can select the item and define the width and height in the Inspector. This step isn't required, but it can help you determine where to put the item on your page, as it will show you the size that the widget will be on your completed page. If there was no mention of the size in the widget creation, you may be able to find it in the code, sometimes denoted as "w" and "h".
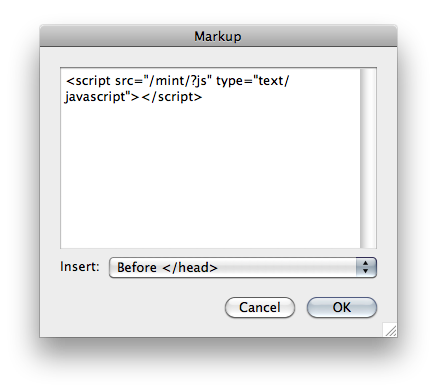
Occasionally, a widget will require that a piece of code be put in the Head section of the page, and then another piece of code that goes in the Body. The piece that goes in the body will be done with the same method above, but the Head section is handled a little differently.
Copy the code that goes in the Head, and select Page > HTML Markup in Freeway. Paste the code in the dialog box, and be sure that Insert: is set to "Before </head>", and click OK.
That's all it takes! Preview the page to see your new widget in action.
Occasionally, a widget will require that a piece of code be put in the Head section of the page, and then another piece of code that goes in the Body. The piece that goes in the body will be done with the same method above, but the Head section is handled a little differently.
Copy the code that goes in the Head, and select Page > HTML Markup in Freeway. Paste the code in the dialog box, and be sure that Insert: is set to "Before </head>", and click OK.